One detail I am learning the value of is lining or double layering a garment. Lining has several benefits. It stabilizes weak areas, it gives edges a professional look, and often it eliminates the need to wear an undershirt or slip. I made a very simple, double layered tank and was very happy with the results.

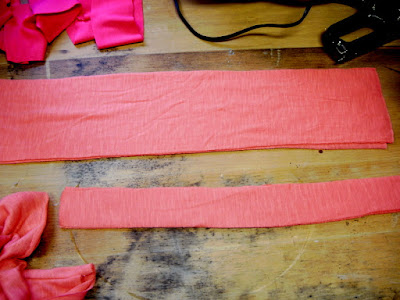
Layering takes more time and material, but the finished result does not need to be hemmed so it makes up for the extra effort. To make this I cut out four pieces of a basic tank.
This orangey color did not photograph well so you will have to excuse the pictures. I wanted a bit of a ruffle on the shoulders to add interest so I also cut out 2 strips 12 inches long. I made the belly a bit loose to accommodate my baby bump so I also cut out strips for a band across the bottom. I cut out four so the band would also be double layered.
First, I sewed two layers of the shirt together right sides together leaving the bottom open. I turned them right sides out and sewed the other two layers the same way. Now I sewed them both together just as you would a normal garment. At this point you can either hem the bottom or as I did, add a band. The band was sown together first just as the shirt layers were and then sewn to the bottom of the shirt. Now I didn't have to hem anything! Whoohoo! I really dislike hemming!
The easiest way to make a ruffle is to set your stitch length to the longest it will go, and your tension to the tightest it will go. The material will ruffle as you sew. If you want a tighter ruffle just pull gently on your bottom thread and it will ruffle up tighter. I sewed my ruffles onto the edge of my sleeve then sewed down the other edge of the ruffle.
There is no end of options for what can be done to add a bit of interest to an otherwise plain shirt. I kept this pretty simple.
Ho hum, speaking of details...I suppose I better consider cooking dinner a detail and give that some attention. Happy Sewing!
Linking to:
Tea Rose Home Link Party
Sew Much Ado: We did it!
Someday Crafts whatever goes wednesday
Freckled Laundry: Air your laundry friday


very lovely top!
ReplyDeleteabranconier.blogspot.com
Aw this is so cute! I love that shoulder detail.
ReplyDeletePS: I’m doing my first ever giveaway on my blog and I’d love if you would stop by and participate! Check it out: http://mygirlishwhims.blogspot.com/2011/02/my-first-giveaway-and-introducing-your.html
Ditto. This is really cute! Thanks so much for sharing with Air Your Laundry Friday.
ReplyDeletexo,
Jami
Did you know that you can shorten your links with Shortest and earn cash for every visit to your short links.
ReplyDelete