Showing posts with label kitchen. Show all posts

Thursday, March 21, 2013

DIY Kitchen Countertops


          Every now and then, you come across things (or whole rooms) in your house that just need a little sprucing up...you know, they just are lacking something. Sometimes you can't just put your finger on what that might be...


     ...and sometimes...you can figure it out pretty easily.


       If you read this post about my unfortunate pink kitchen, you know I had big plans for this unsightly room of mine. "Big plans" equals "big work", and in most cases, "big spending" as well. Work, I can handle, the money part on the other hand...well, we might just have to consider that one a bit. I decided to shop our options for counter tops. We needed something cost efficient and durable. 
       One thing we knew for sure, labor is the major cost of any home improvement, so we wanted to the work ourselves...even though we did not have a clue what we were doing!


         Obviously, the first thing we had to do, what get rid of few things.


       Then, using liquid nail and screws, we attached a new counter top using pine panels found in the lumber section at Lowes. You can buy these in different lengths and widths. We used 24 inch wide and 1 inch thick pieces.
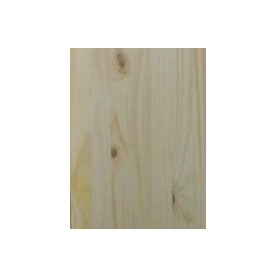
 1-in x 24-in x 36-in Stain Kiln-Dried Kiln-Dried Elliotis Pine Panel
    My mister cut them to fit together around the corners and used a jig saw to cut out a spot for the sink. He screwed them on from underneath. I very dumbly deleted all of the pictures I took of this entire process, but it's pretty self explanatory. Glue, set the boards in place, and then screw. I pretty much think he did an amazing job getting everything to fit just right.


      At that point, I took over, and used an electric sander to even out all the cracks and make it baby smooth. The sink really should have been put in last, but we didn't figure that out until right about this point. Oh well. After sanding it down, I stained it with black stain.
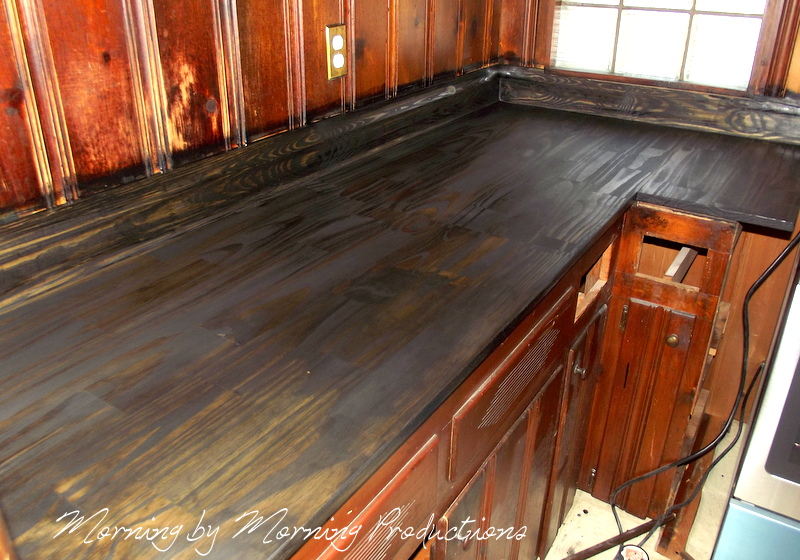

      At this point, I was starting to wonder if this had been such a good idea after all. We were too far in to quit now, so next up was the varnish. I used a heavy duty Polyurethane and a sponge brush to apply it.


     I gave it six coats, lightly sanding between each coat. It looked immensely better with some shine!


    To be honest though, I still wasn't 100% sure I was on board with it though. It was all just so dark looking still, that I couldn't really tell if they were good or not. A little white paint to let the sunshine pour into that dingy old dark kitchen did the trick. They get my vote now, for sure and for certain!


      Sometimes, looking at what things cost can be quite disheartening ..but maybe, you're just looking in the wrong department? There's no law that says kitchen counters have to be ordered from the kitchen department. They actually might be hiding out in the lumber isle...or the roofing section, or on the cement shelf, or you name it!


       You can make just about anything work, if you are willing to give it a try...even if you've never done it before! What can it hurt? Most likely, even an imperfect job will be worlds better than what you started with!


    Things don't happen over night, but as with anything, persistence will pay off! And now that I've delivered this inspiring pep talk, I'm off to paint cabinet doors...which anyone within a 50 mile radius has probably heard me griping about in the last week! I don't see why we need cabinet doors anyway...
Have a great weekend!

Hebrews 11:1   Now faith is the substance of things hoped for, the evidence of things not seen.

Monday, February 18, 2013

Simple DIY Pendant Light


    There are certain things in life that I find truly annoying. Parking lots that don't connect. Finding out I'm out of ketchup. Coffee spilling all over my purse in the car. Paint drips. Contacts that won't stick to my eyeballs. Little girls playing in toilet water. And bad lighting. Especially bad lighting. This house could win awards for bad lighting. I don't get it either, the light bulb is not a new invention. They had light bulbs in the 50's didn't they??!! Maybe shadowy, dark, dingy houses were fashionable back then. I don't know, but I've declared war on the shadows. This house will light up brighter than the Christmas tree in Times Square when I'm done with it. (Do they have a Christmas tree in Times Square? I don't actually know, but if they did I'm sure it would be bright.)
   Unfortunately, there is an extreme limit to where new lights can be hard wired into the ceilings. This house is mostly wood, and you can't just go hacking holes in wood to run wire through like you can drywall...unless of course you plan to replace the whole wall...which would require some pretty substantial funding. So, what is a light loving gal to do, but create her own light?


     As you might have already read, we have begun work in the kitchen, and it has major lack of light issues. I'm hoping that when we replace the ceiling light, that will take care of most of the problem. But the sink needed some extra light, I don't want to be chopping of my digits because I can't see what I am doing. (I'm dangerous enough when I CAN see what I'm doing!)


     (Oh, I see you peaking at my new faucet! Can't wait to show you more on that later!) I made this simple pendent light in about 15 minutes and it cost me $15. All you need is a portable pendent light, like this one. I got mine from Lowes. It is basically a super long cord that plugs into the wall with a light socket on the end, and an on and off switch attached.


      Next, you'll need the shade of your choice. You can use a regular lamp shade, or just about anything else you can dream up to make work with it. (Bonus points if it's got rust on it!) My shade of choice was this metal pitcher I got at the thrift store for, oh, maybe 25 cents or so.  If your object doesn't have holes in it, you'll also need tools to make some holes.


     I punched a small hole in the center of the bottom, and a larger one off to the side of that. The larger one needs to be able to fit the plug through it. It doesn't have to be pretty, no one will see this part.


    Pull the plug through from the inside.


     Position the socket securely in the holes.


     Now hunt down a light bulb and bask in the warm glow of your new light!


     It makes my heart pitter patter. Truly. And, since I have three other rooms that most unfortunately cannot be hardwired with new lights, I expect you will be seeing several more posts on this same subject. Who knows, I may end up loving my "junk" lights better than my new store bought ones!

Psalms 119:130   The entrance of thy words giveth light; it giveth understanding unto the simple. 
Pin It

Linking to:
Kammy's Korner
HomeStories A to Z
Chef in Training
Sugar Bee Crafts
Someday Crafts
Homemaker on a dime
Boogieboard cottage
Under the Table and Dreaming

Monday, February 4, 2013

The Kitchen - The good, the bad, and the ugly (mostly ugly)

       Well good morning! How was your weekend? We are finally all moved in, set up with internet, and even have a way to cook and wash our clothes...great progress indeed! Now that we are situated back in one spot again, and happily reunited with our belongings, I have decided to re-open my Etsy shop. Hurray! Honestly, I really just miss sewing! I mean painting my fingers off and hacking things up with crowbars is great fun, but it just doesn't beat sewing! I've only listed about a third of the items, because I want to make sure I can keep up with everything. (And that I can actually find the supplies to make said items in my small jungle of boxes!)
       Anyway, I actually got on here to talk to you about kitchens. See, I've got this kitchen in my new (old) house that is just not so lovely. In fact, its rather awful, not to mention hideous. It began like this...dark as a cave, refrigerator plopped in a weird encasement smack in the middle of the counter, and the dirtiest pink counter tops you've ever seen in your life! (I actually haven't seen pink counter tops before this...I hope I don't have the pleasure again!)

 
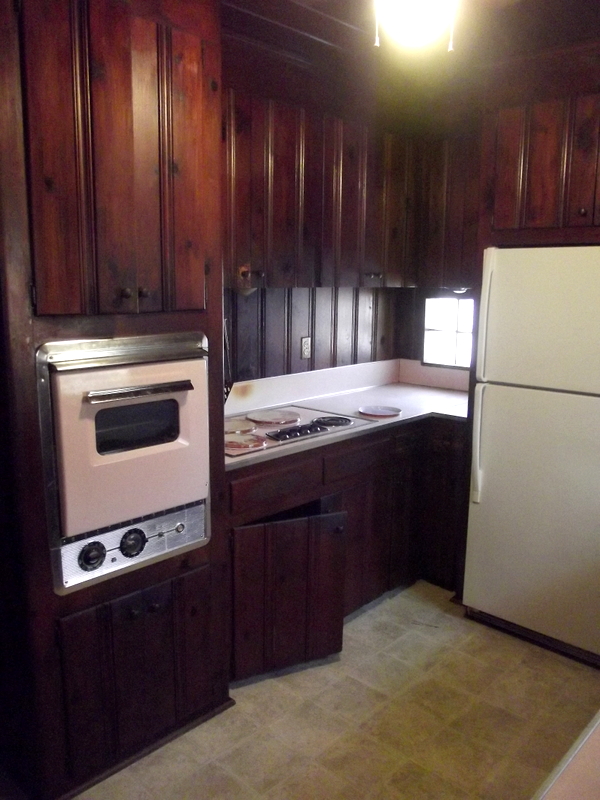
     And on the left side over here, we have a counter top range and antique pink oven...both that have been out of use for who knows how many decades! (So, what exactly did the previous owner eat I wonder?? Cold cereal every day?) Oh yes, and don't forget that odd little window in wall...eh? Odd.


        And lastly we have the laundry closet....At least I think it was, that is where the plumbing went for a washer. The closet isn't deep enough to fit a washer into it, so that is a bit of a mystery to me. It's pink too...and dirty. Very dirty.


     So. Now that I've seared your eyeballs, let's continue. Here is what we have done so far. I had this cabinet hollowed out.


     This made space for a dishwasher to be installed.


      I had the weird wood encasement around the refrigerator removed, which created a nice spot for the oven and microwave. I also removed the doors from the cabinets on either side to create open shelving. It's rather hard to see since the walls are so dark.


      My mister, to my everlasting joy, removed the pink counter tops and old appliances.


      Gaping holes and glue-y plywood is ever so much better, don't you agree?


      And last, I removed the doors to the laundry closet, cleaned it (and cleaned it some more!), and had an outlet installed to accommodate the refrigerator. It's still pink for the time being, but at least it's clean! (By the way, that's plastic still covering my fridge, not a giant wart exploding on the door.)


     This closet will be the pantry. I plan to paint it some nice accent color (maybe stencil a design on the walls?), and install shelving above and on the right side of the fridge. Right now the hot water heater is on the right, but we hope to have a tank-less one put in, so that will get rid of that. I'm thinking something along these lines.

Pinned Image
Pinterest (original source?)

    For the gaping hole left by the old oven, I plan to install drawers similar to these. I'm thinking if I had a plug put in the back, I could keep heavier appliances in the drawers, and just pull them out to use them.

Pinned Image
Pinterest (original source?)

      The cabinets are originally custom built, solid wood, so I won't be messing with them. I like them, and they are much better quality than the builder's grade cabinets most houses have now. I'll paint them, and switch out the hardware to black or stainless steal. For the counter tops, I plan (ok really, I plan for my mister) to do a DIY butcher block using wood boards, but stain them super dark. 

dark counter top
Pinterest (original source?)

     For the open shelving that was created around the stove, I plan to put brackets under the shelves. The whole shebang will be painted white, and the ceiling left wood. 

Pinned Image

      I'm not sure what the plan will be for the floor just yet, probably paint it. I'd like to switch out the ceiling fan/light for something rustic/antique looking. Over all, I'm going for fresh white, with woods and dark accents mixed in...something along these lines. 

Pinned Image
      Of course, it is rather difficult to see that in what I'm looking at now...but it will get there! Check back around in a few weeks, and we'll see what we've got then!
Have a great start to your week!
P.S. I'm really sorry I can't find the original sources to some of the above pictures...if anyone knows them, let me know so I can give credit!

Psalms 16:11   Thou wilt shew me the path of life: in thy presence is fullness of joy; at thy right hand there are pleasures for evermore. 
Pin It

Wednesday, February 22, 2012

My Wonderously White Kitchen

      My. Cabinets. Are. DONE!!!!! Whoohoo! I am beyond pleased about how they turned out, and even more so that I am finished with them! For once, I am so super happy I have an itsy bitsy sized kitchen! I cannot imagine doing one any bigger. My patience for tedious projects is non-existent.
     Here is what I had to work with.


       You may be wondering why the cabinets look like they have mud on them. I can explain. When we first moved in, they were the most awful shade of pinkish wood. It looked like skin, and it grossed me out. I didn't have time to paint them at that time, so glazed the cabinets right over that pink wood to "rustify" them. My mister decreed they looked dirty, but I didn't care. At least they weren't pink!
    Here is my beautiful little kitchen now!


     Amazing how paint can make a space feel so much more open! This little space can barely fit two people in it at time.


       But, it certainly feels larger with the nice clean white.


      I debated distressing, or glazing them. In the end though, I decided I wanted to keep it simple and crisp. I have a lot of other distressed and glazed furniture, and I didn't want everything to look too matchy matchy. I can always change it up later if I get bored with it.


     I have plans for that little space on the top there, but I have to find what I need to do it first. Those baskets hold hot pads, and such like things that I don't have drawer space for. This crate keeps all our coffee making ingredients handy and not looking too messy. It also hides the fact that I switched paint colors in the middle of a wall! =)


      Here are a couple tips from my experience. I used a one and a half inch Purdy brush, a small foam roller, and a slightly larger roller to paint with. That small foam roller was well worth buying. It saved my sanity quite a bit on the small flat areas to keep brush strokes from showing.


      I primed them with this primer.


     I found that cans were super helpful to prop up the drawers and doors while I painted them.


      One last tip for you that I learned from my super smart big sister. Once you've rinsed out your brushes, pat them dry and throw them in the freezer in a Ziploc bag.


      Once they've frozen, take them back out and let them defrost. Pat them dry again. This keeps them from getting crunchy. They will always stay soft no matter how much you use them! Just remember to thaw them out well before you're ready to work again. It's phenomenally annoying to get all ready to paint, only to realize you have frozen brushes! Not that I would know from experience or anything....


      Aren't those tulips lovely? My sweet mister bought them for me. I just love them.


        All in all, this was a project well worth doing!


      Have a superb rest of your week!

Psalms 37:23 The steps of a good man are ordered by the LORD: and he delighteth in his way.

linking to:
The Inspired Room
Miss Mustard Seed
Simple Home Life

the vintage farmhouse

Pin It