Showing posts with label before and afters. Show all posts

Thursday, March 21, 2013

DIY Kitchen Countertops


          Every now and then, you come across things (or whole rooms) in your house that just need a little sprucing up...you know, they just are lacking something. Sometimes you can't just put your finger on what that might be...


     ...and sometimes...you can figure it out pretty easily.


       If you read this post about my unfortunate pink kitchen, you know I had big plans for this unsightly room of mine. "Big plans" equals "big work", and in most cases, "big spending" as well. Work, I can handle, the money part on the other hand...well, we might just have to consider that one a bit. I decided to shop our options for counter tops. We needed something cost efficient and durable. 
       One thing we knew for sure, labor is the major cost of any home improvement, so we wanted to the work ourselves...even though we did not have a clue what we were doing!


         Obviously, the first thing we had to do, what get rid of few things.


       Then, using liquid nail and screws, we attached a new counter top using pine panels found in the lumber section at Lowes. You can buy these in different lengths and widths. We used 24 inch wide and 1 inch thick pieces.
 1-in x 24-in x 36-in Stain Kiln-Dried Kiln-Dried Elliotis Pine Panel
    My mister cut them to fit together around the corners and used a jig saw to cut out a spot for the sink. He screwed them on from underneath. I very dumbly deleted all of the pictures I took of this entire process, but it's pretty self explanatory. Glue, set the boards in place, and then screw. I pretty much think he did an amazing job getting everything to fit just right.


      At that point, I took over, and used an electric sander to even out all the cracks and make it baby smooth. The sink really should have been put in last, but we didn't figure that out until right about this point. Oh well. After sanding it down, I stained it with black stain.
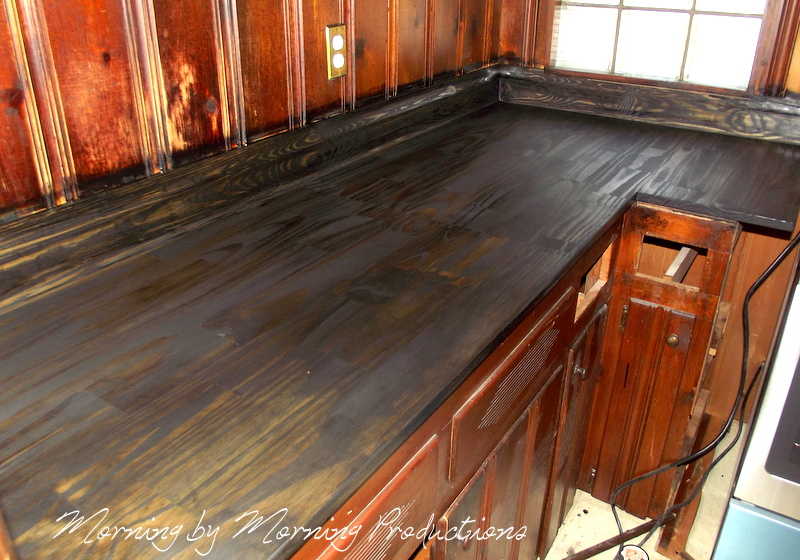

      At this point, I was starting to wonder if this had been such a good idea after all. We were too far in to quit now, so next up was the varnish. I used a heavy duty Polyurethane and a sponge brush to apply it.


     I gave it six coats, lightly sanding between each coat. It looked immensely better with some shine!


    To be honest though, I still wasn't 100% sure I was on board with it though. It was all just so dark looking still, that I couldn't really tell if they were good or not. A little white paint to let the sunshine pour into that dingy old dark kitchen did the trick. They get my vote now, for sure and for certain!


      Sometimes, looking at what things cost can be quite disheartening ..but maybe, you're just looking in the wrong department? There's no law that says kitchen counters have to be ordered from the kitchen department. They actually might be hiding out in the lumber isle...or the roofing section, or on the cement shelf, or you name it!


       You can make just about anything work, if you are willing to give it a try...even if you've never done it before! What can it hurt? Most likely, even an imperfect job will be worlds better than what you started with!


    Things don't happen over night, but as with anything, persistence will pay off! And now that I've delivered this inspiring pep talk, I'm off to paint cabinet doors...which anyone within a 50 mile radius has probably heard me griping about in the last week! I don't see why we need cabinet doors anyway...
Have a great weekend!

Hebrews 11:1   Now faith is the substance of things hoped for, the evidence of things not seen.

Thursday, March 14, 2013

Industrial Style Desk Makeover


       We've been having some really lovely sunny days lately. Definitely not the sort of days I want to spend holed up inside slaving over some boring wall that needs painting. On a nice warm sunny day, the thing to do is dress your kids in grungy clothes and let them go stomp in the mud puddles to their little heart's content, while you pull out some random piece of junky furniture to fix up.


      I found this beauty at a thrift store and immediately liked the sort of old school industrial vibe it had. The top was particle board and the seat was some ratty vinyl stuff, so that all needed to come off. I freshened up all the metal with some spray paint.


      I needed a new seat for the chair, and decided to make my own with some scrap wood.


       Only one problem, I had no foam for the seat. Well, good thing I'm not picky about these sorts of things! An unused throw pillow did the trick for me just nicely.


      Using some fabric I found in my stash, I stapled it all directly to the back of the wood.


       It made just the nicest little seat you ever saw!


     There was one other problem with this little arrangement that I needed to do something about. The desk was just a smidgen too short for my rather tall self. I scrounged around amongst my treasures and found some wheels I had saved off of some discarded piece of something who knows how long ago. It really does pay off to save things you might be able to reuse! The wheels added just the needed amount of height. Wheels make anything niftier anyway.


       Luckily, I had some wood left over from making our counter tops (Which I am dying to show you, because I looooooooove them!) that was just the perfect size for the desk top.


      A coat of stain and two of poly later...one super cute desk!


       Totally more fun than painting walls, wouldn't you agree?


         This little desk is currently operating as my sewing table, and is pushed up against my horrifically ugly unpainted cinder block wall. Which pretty much is a daily reminder that I need to paint the thing, and fix the floor, and....ok, anyway, back to my cute desk...


      In other news, I'm in the midst of painting my kitchen...and if the tedious time consuming-ness of it doesn't kill me first, I'll be giving you the grand tour soon! I love what paint can do for a room! It sorta shocks my eyeballs when I walk in there, and I'm still at the priming stage! Love it!
P.S. I'm having a Spring sale in my shop, all bags 50% off!

Luke 6:35   But love ye your enemies, and do good, and lend, hoping for nothing again; and your reward shall be great, and ye shall be the children of the Highest: for he is kind unto the unthankful and to the evil.

Monday, February 25, 2013

Brick laying 101 (Minus the mortar!)


      One of the most glorious things about this house is that I get to have my very own work room. Pure luxury! As you might imagine, I am brimming with ideas for this lovely little room of mine. I'm actually only here today to discuss one wall of it. This end one, that began like this...


     As you can see, the two side walls have cinder block (left over from it's garage days) and the end one had wood on the top and paneling around the bottom. Paneling is lovely and all that, but I decided it need to go, and took a crowbar to it. Unfortunately, on the end wall, the wood did not continue all the way to floor all the way across. The gap had to be covered, and the easiest way would be to use paneling again. Ugh. Fortunately, I had already had my eye on this brick-like paneling I had seen at Lowes.


     I figured that with a bit of imagination with paint, this stuff could be made to look half decent. And so, up it went. I caulked all the cracks to help even them out. I should have sanded over the caulk after it dried, but I did not. Learn from my mistake, and don't skip that if you try this! It would have helped to make the caulk less obvious later.


      Next, I painted all the mortar lines with white. If it happened to drip at all, I just smeared it over the brick.


      Next, I dry brushed over all of it, first with white, then cream, then grey. I did it as randomly and unevenly as possible.


     At this point, I decided it was looking a little flat and dry brushed over it with just black. You can get a nice affect if you wipe off most of the paint from the brush, and then sort of scratch it sideways across the bricks.


     The black helped define the bricks, and added some depth to the lighter paint.


      I think I still might go over a few spots with the black again a little later. Anyway, I quite like the rustic affect it adds to the room. So...just in an effort to keep things real...here's what that room is looking like at the present. Please try to use your imagination, it has great potential, I promise.


     Here is an interesting post I found that is very similar to mine, only her's is on a larger scale. Click here.
I'm really excited about getting this room set up for use! I plan to make it as functional as possible, yet pretty to look at. Here are a few of my inspiration pictures, which might help you see what direction I am headed here.

brick walls

black floors + brick wall

Love the walls

#booths #craft fair

This is gorgeous!

rustic, inspiring

industrial touch, vintage furniture, lovely details

     So there you have it, lots of work in the works! =) So far we have a light, and one wall. Well, it's progress one step at a time. Hope you have a grand start to your week!

Psalms 119:73   Thy hands have made me and fashioned me: give me understanding, that I may learn thy commandments. 

Sunday, January 13, 2013

Crate Wall Storage

     Well hello there! How was your weekend? Mine was productive. So productive in fact, that I actually finished something to show you! I know, stunning.


     The only room in this old house of ours that has ever been painted or updated is the downstairs guest bathroom. A very small bathroom I might add.  Somehow a shower, pedestal sink and toilet were all miraculously made to fit in this tiny little room. Needless to say, there is absolutely no space for any sort of storage for all the items that typically a guest might need to find in a bathroom. If there was one thing I learned in my last tiny little home, it would be the art of cramming a lot of stuff into a small space! Although this house is more than twice the size of that one, I'm finding my "small house" mentality is proving helpful with organizing this one. My method is simple, first look up. What can you do with the vertical space? Second, if the storage has got to be out in the open, make it function as decor as well as storage. So here we go, simple wall storage for my little guest bathroom.


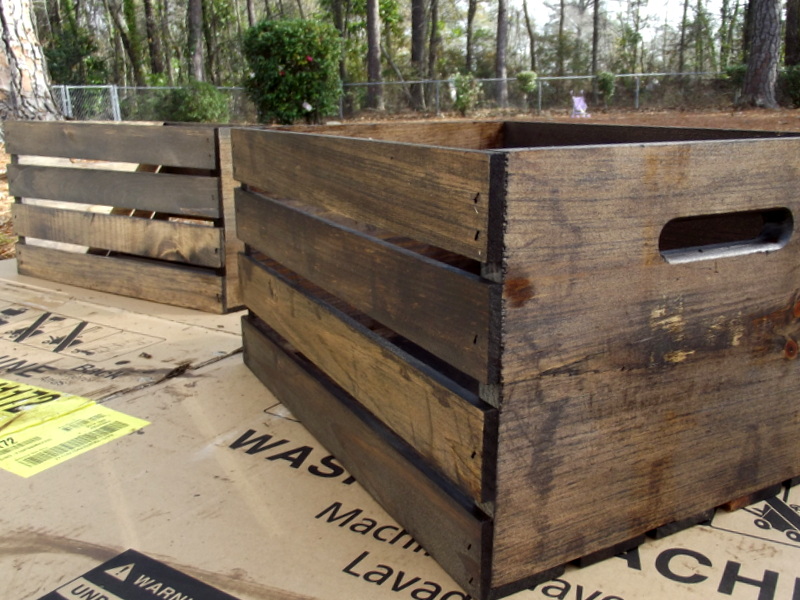
      I picked up two of these crates at Home Depot for $8 each. (Confession: I actually already had about 6 vintage crates I've picked up at flea markets and such that I could have used...but I have a crate collecting obsession, and I couldn't bear the thought of putting the old cute ones in the bathroom. Lame. I know.)


       I stained them with a dark wood stain. I wasn't the least bit worried about it looking perfect, the uneven stain adds to the affect, I think.


      Next, I screwed on some brackets. I found mine at Lowes, I believe.


       I screwed them onto the wall where I wanted them, and that was it!


      I think they are elegantly rustic. Is that a style? Whatever, I like them, and they do the trick just nicely. You know, if you only had one and hung it high enough, you could stick a bar through the brackets for it to double as a towel rack too!


     I'm almost finished with this bathroom, one or two more tweaks to go. The rest of the rooms will go far more slowly I'm afraid, as there is much, much more work to be done in them! Really, just having one room looking pleasant and fresh gives me a boost of energy every time I pass the door. I know the rest of the house will get there with a little time...and the process of getting there is actually pretty fun!


      Enjoy your week!

Psalms 3:3   But thou, O LORD, art a shield for me; my glory, and the lifter up of mine head.