Monday, February 25, 2013

Brick laying 101 (Minus the mortar!)


      One of the most glorious things about this house is that I get to have my very own work room. Pure luxury! As you might imagine, I am brimming with ideas for this lovely little room of mine. I'm actually only here today to discuss one wall of it. This end one, that began like this...


     As you can see, the two side walls have cinder block (left over from it's garage days) and the end one had wood on the top and paneling around the bottom. Paneling is lovely and all that, but I decided it need to go, and took a crowbar to it. Unfortunately, on the end wall, the wood did not continue all the way to floor all the way across. The gap had to be covered, and the easiest way would be to use paneling again. Ugh. Fortunately, I had already had my eye on this brick-like paneling I had seen at Lowes.


     I figured that with a bit of imagination with paint, this stuff could be made to look half decent. And so, up it went. I caulked all the cracks to help even them out. I should have sanded over the caulk after it dried, but I did not. Learn from my mistake, and don't skip that if you try this! It would have helped to make the caulk less obvious later.


      Next, I painted all the mortar lines with white. If it happened to drip at all, I just smeared it over the brick.


      Next, I dry brushed over all of it, first with white, then cream, then grey. I did it as randomly and unevenly as possible.


     At this point, I decided it was looking a little flat and dry brushed over it with just black. You can get a nice affect if you wipe off most of the paint from the brush, and then sort of scratch it sideways across the bricks.


     The black helped define the bricks, and added some depth to the lighter paint.


      I think I still might go over a few spots with the black again a little later. Anyway, I quite like the rustic affect it adds to the room. So...just in an effort to keep things real...here's what that room is looking like at the present. Please try to use your imagination, it has great potential, I promise.


     Here is an interesting post I found that is very similar to mine, only her's is on a larger scale. Click here.
I'm really excited about getting this room set up for use! I plan to make it as functional as possible, yet pretty to look at. Here are a few of my inspiration pictures, which might help you see what direction I am headed here.

brick walls

black floors + brick wall

Love the walls

#booths #craft fair

This is gorgeous!

rustic, inspiring

industrial touch, vintage furniture, lovely details

     So there you have it, lots of work in the works! =) So far we have a light, and one wall. Well, it's progress one step at a time. Hope you have a grand start to your week!

Psalms 119:73   Thy hands have made me and fashioned me: give me understanding, that I may learn thy commandments. 

Thursday, February 21, 2013

Wood Walls are not Drywall! - How to paint finished wood walls


       Have you ever had a project you thought you would just whip right through...only to find out it wasn't quite as simple as you thought? I tend to do that, a lot. Take these wood walls for instance...I've painted lots of walls before, how hard could it possible be?? These ever so shiny, heavily oiled and varnished walls would not be any more trouble than your average plain Jane drywall. Give me two weeks, I'd have the whole house done, no problem.


    You know just how long it took me to get the entry done? Two weeks(See more about it here.)


    And that was doing it the cheaters way! See, the contractor who has been doing some work for us, told me that I would have to sand each board individually, before I could pant! At first I thought he was joking, but when I looked at him, he was dead serious. My heart sunk, fill my freshly scrubbed out house with sawdust? Not on your life! What my kind contractor did not realize is, I am not a professional, nor am I patient. I also "take" two very active and curious little girls to work with me. Projects need to be short and sweet or drastically inconvenient things can happen!
     If you are like me, and have a small forest of wood in your house to paint, I present to you...the cheaters way to paint finished wood walls in four easy steps. (If you are a contractor or a wood lover, please avert your eyes.)
     Number 1. CLEAN it! I had no idea just how dirty those walls were until I started washing them. (This has become my prime argument for white walls, at least I can SEE when it needs washing!) I used TSP which is a degrease. Do this step as many times as is needed to be certain the wall is clean.

TSP All-Purpose Cleaner

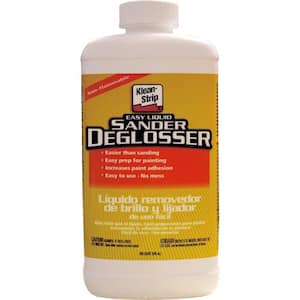
     Number 2. Sand it...using liquid sander. No dust, super quick and easy...I am a huge fan. I am not super picky about this step, just rub the wall down once with an old t-shirt and this stuff. It basically just etches the surface a bit. 

Klean-Strip 1 qt. Easy Liquid Sander

     Number 3. Prime it. Make sure you get a primer that SEALS as well as primes. Wood knots and the old varnish will bleed, so it is very important that the wood is sealed. I use this one. 

     This step is the most important one. You have to keep applying primer until there is no more bleed through and there is no more wood showing. You must let each coat of primer DRY completely before applying the next coat. For the first coat, thinner is better. My first wall, I did a nice thick coat for the first coat, and it gunked up and took forever to dry. I thought I had ruined the wall, but it turned out ok. I've learned go thin on the first, thicker on the second, and touch up on the third. Yes, you read that correctly, three coats. Fun. Even funner, all the cutting in you have to do with a pant brush. One can't simple roll over these walls with a roller brush, all the cracks must be hand brushed first.


     The first coat takes the longest and looks horrific. You will wonder what on earth you have done! (I'll be painting those stairs later, that's why I didn't bother taping them off.)


      There will most likely be some gunked up yellow spots where there are thicker patches of varnish interacting with the primer. Don't panic, the second coat will even it out.


    Number 4. The fun step, paint that sucker! I usually only need one coat of paint, and a touch up. Easy peasy. I use the primer/paint mix of the Behr brand paint from Home Depot just for good measure. (The weird shadows are from the chandelier, I promise the final coat is nice and even!) I also use semi gloss which has a bit of shine and is very easy to clean.


     So far, my method is working out nicely. I dropped a metal decoration the other day, and it slid all the way down the wall without leaving a single mark or scratch. All those coats makes for a pretty durable finish. Above all, don't be fooled, wood walls are not drywall! (But in my personal opinion, they are much prettier and worth all the extra work!)
    Incidentally, another piece of random information about these walls, my contractor informed me that these are all individual boards hand crafted to fit! I just assumed they were large panels or something. The fact the my entire house house has these walls, parquet floors and planked ceilings downstairs, and custom cabinets blows my mind. Whoever built this house had more patience than I would have in fifteen lifetimes! Cutting and fitting all that wood...makes me shutter to think about it! I'll stick to painting it, and maybe I'll finish sometime in this century.

Psalms 90:12   So teach us to number our days, that we may apply our hearts unto wisdom

Monday, February 18, 2013

Simple DIY Pendant Light


    There are certain things in life that I find truly annoying. Parking lots that don't connect. Finding out I'm out of ketchup. Coffee spilling all over my purse in the car. Paint drips. Contacts that won't stick to my eyeballs. Little girls playing in toilet water. And bad lighting. Especially bad lighting. This house could win awards for bad lighting. I don't get it either, the light bulb is not a new invention. They had light bulbs in the 50's didn't they??!! Maybe shadowy, dark, dingy houses were fashionable back then. I don't know, but I've declared war on the shadows. This house will light up brighter than the Christmas tree in Times Square when I'm done with it. (Do they have a Christmas tree in Times Square? I don't actually know, but if they did I'm sure it would be bright.)
   Unfortunately, there is an extreme limit to where new lights can be hard wired into the ceilings. This house is mostly wood, and you can't just go hacking holes in wood to run wire through like you can drywall...unless of course you plan to replace the whole wall...which would require some pretty substantial funding. So, what is a light loving gal to do, but create her own light?


     As you might have already read, we have begun work in the kitchen, and it has major lack of light issues. I'm hoping that when we replace the ceiling light, that will take care of most of the problem. But the sink needed some extra light, I don't want to be chopping of my digits because I can't see what I am doing. (I'm dangerous enough when I CAN see what I'm doing!)


     (Oh, I see you peaking at my new faucet! Can't wait to show you more on that later!) I made this simple pendent light in about 15 minutes and it cost me $15. All you need is a portable pendent light, like this one. I got mine from Lowes. It is basically a super long cord that plugs into the wall with a light socket on the end, and an on and off switch attached.


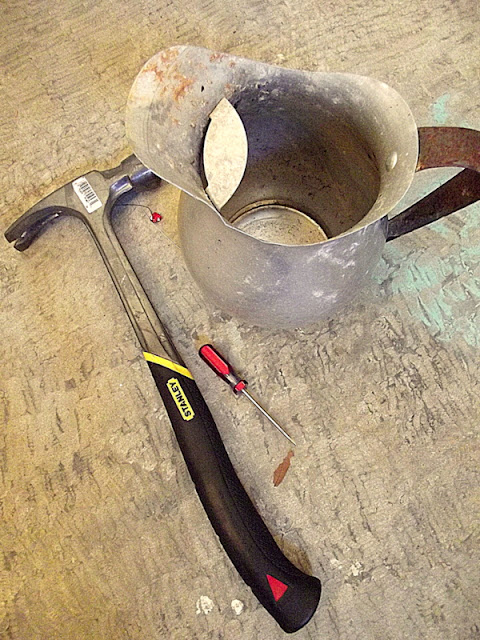
      Next, you'll need the shade of your choice. You can use a regular lamp shade, or just about anything else you can dream up to make work with it. (Bonus points if it's got rust on it!) My shade of choice was this metal pitcher I got at the thrift store for, oh, maybe 25 cents or so.  If your object doesn't have holes in it, you'll also need tools to make some holes.


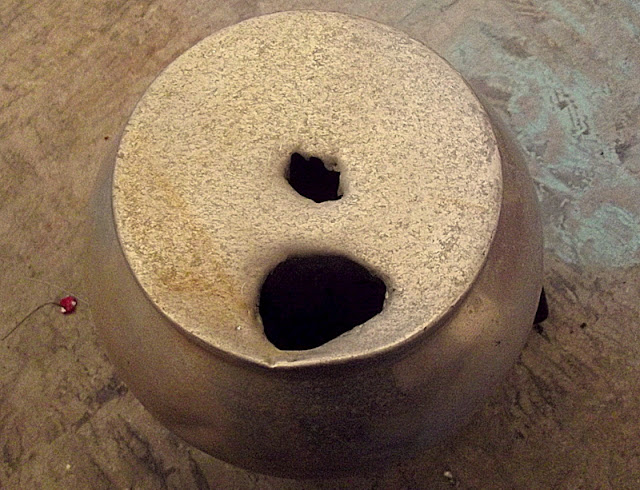
     I punched a small hole in the center of the bottom, and a larger one off to the side of that. The larger one needs to be able to fit the plug through it. It doesn't have to be pretty, no one will see this part.


    Pull the plug through from the inside.


     Position the socket securely in the holes.


     Now hunt down a light bulb and bask in the warm glow of your new light!


     It makes my heart pitter patter. Truly. And, since I have three other rooms that most unfortunately cannot be hardwired with new lights, I expect you will be seeing several more posts on this same subject. Who knows, I may end up loving my "junk" lights better than my new store bought ones!

Psalms 119:130   The entrance of thy words giveth light; it giveth understanding unto the simple. 
Pin It

Linking to:
Kammy's Korner
HomeStories A to Z
Chef in Training
Sugar Bee Crafts
Someday Crafts
Homemaker on a dime
Boogieboard cottage
Under the Table and Dreaming

Friday, February 15, 2013

Behind the Front Door - The Before and the After

     There's a funny thing about this house, it makes people give "the look". When we told our realtor we wanted to go see this house, she gave us "the look". She was very opposed to wasting our time (or hers!) with it. 


       I got "the look" from the nice fellow who came to change my locks the day we bought it.


      I have to admit, I even gave "the look" to my mister the first time he showed me the pictures of the house online...but then we went to see it...and I just knew it could be something beautiful.


      A scrub brush...


      ...and a bit of paint, can go a long way...


     ...to helping "the look" disappear for good. There needs to be a few trips the thrift store and to the flee market, to help round things out, of course.


    The goal? Make it tidy and functional...


     ...keep it personal, tell a story...


     ...make it feel like a home.


      Goal accomplished.


      The nitty gritty details are below, if you are into that sort of stuff! If not, enjoy your weekend!

Silver plates - thrift store
Iron hooks - Hobby Lobby
Shoe picture - My picture of my family's shoes I modpodged to a board
Picture hooks - Plant hooks turned upside down from Walmart
Bench - roadside junk store
Crate - Flea Market
Rug - Walmart, I painted, Tutorial Here
Table - actually a sewing table that was given to me and I painted
Mirror - thrift store, painted and glazed with black
Lamp - salvage shop, painted and glazed with black
Lamp shade - I made, Tutorial Here
Scrolly dodad - Thrift store, painted and dry brushed with silver
Birdcage - Thrift store, painted
Welcome sign - Made from a thrifted cabinet door and letters from Hobby Lobby, painted
Home Sign - Hobby Lobby
Chandelier - Lowes
Walls - Sanded with liquid sander, primed with Zinsser Bulls Eye and painted with semi gloss Behr Antique White from Home Depot (tutorial to come)

Deuteronomy 33:25   ...and as thy daysso shall thy strength be. 

Friday, February 8, 2013

A Chandelier Style Skeleton Lampshade


      I've been fiddling with my entry way. I feel like if the house looks fresh, clean, and inviting when I first step through the door, I'll feel better about the mess beyond. I'll give you the full scoop on where I started in this section of the house, and what it looks like now, a little later when I'm all done fiddling. (And you are soooo going to love the difference!) For now, lets talk about lamp shades.


    I have this phobia of walking into a dark house. If someone is in my house who isn't supposed to be, I'd rather look at 'em right in the eyeball than in the dark! (Actually, I'd probably be fainted from fright on the floor but whatever.) Because of the way this house was constructed, it was impossible to put a light switch to the foyer light right beside the door without ripping out walls. The next best solution was to have a lamp within easy reach of stepping through the door. I happened upon a couple lamps in my local salvage shop that were super duper cheap, which filled the need for a lamp just nicely.


     They were lacking a shade, so I scrounged around in my boxes and piles of things yet to be unpacked and found this rather drab brown one.


    Eh, not so much the look I was going for, so out came the scissors.


       Aghh, much better. Now, I need to fancy things up a tad. I used some crystally do-dads I found half off in the wedding section of Hobby Lobby to add some sparkle. (...And I forgot to take a picture, but it's a long wire strand thing and some strung together crystals.)


     I also painted the base of the lamp silver, and glazed it with black. It goes quite nicely with it's new blingy shade.


      And it compliments the chandelier I had installed as well, which was the goal.


      I can't wait to show you this whole little entry, I'm so happy with how much better it looks! I hope your weekend is as happy and sparkly as my new lampshade!

Psalms 119:105   Thy word is a lamp unto my feet, and a light unto my path.