

Have you ever had a project you thought you would just whip right through...only to find out it wasn't quite as simple as you thought? I tend to do that, a lot. Take these wood walls for instance...I've painted lots of walls before, how hard could it possible be?? These ever so shiny, heavily oiled and varnished walls would not be any more trouble than your average plain Jane drywall. Give me two weeks, I'd have the whole house done, no problem.

You know just how long it took me to get the entry done? Two weeks! (See more about it here.)

And that was doing it the cheaters way! See, the contractor who has been doing some work for us, told me that I would have to sand each board individually, before I could pant! At first I thought he was joking, but when I looked at him, he was dead serious. My heart sunk, fill my freshly scrubbed out house with sawdust? Not on your life! What my kind contractor did not realize is, I am not a professional, nor am I patient. I also "take" two very active and curious little girls to work with me. Projects need to be short and sweet or drastically inconvenient things can happen!
If you are like me, and have a small forest of wood in your house to paint, I present to you...the cheaters way to paint finished wood walls in four easy steps. (If you are a contractor or a wood lover, please avert your eyes.)
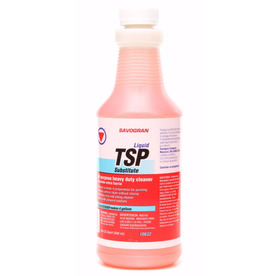
Number 1. CLEAN it! I had no idea just how dirty those walls were until I started washing them. (This has become my prime argument for white walls, at least I can SEE when it needs washing!) I used TSP which is a degrease. Do this step as many times as is needed to be certain the wall is clean.
Number 2. Sand it...using liquid sander. No dust, super quick and easy...I am a huge fan. I am not super picky about this step, just rub the wall down once with an old t-shirt and this stuff. It basically just etches the surface a bit.

Number 3. Prime it. Make sure you get a primer that SEALS as well as primes. Wood knots and the old varnish will bleed, so it is very important that the wood is sealed. I use this one.


The first coat takes the longest and looks horrific. You will wonder what on earth you have done! (I'll be painting those stairs later, that's why I didn't bother taping them off.)

There will most likely be some gunked up yellow spots where there are thicker patches of varnish interacting with the primer. Don't panic, the second coat will even it out.

Number 4. The fun step, paint that sucker! I usually only need one coat of paint, and a touch up. Easy peasy. I use the primer/paint mix of the Behr brand paint from Home Depot just for good measure. (The weird shadows are from the chandelier, I promise the final coat is nice and even!) I also use semi gloss which has a bit of shine and is very easy to clean.

So far, my method is working out nicely. I dropped a metal decoration the other day, and it slid all the way down the wall without leaving a single mark or scratch. All those coats makes for a pretty durable finish. Above all, don't be fooled, wood walls are not drywall! (But in my personal opinion, they are much prettier and worth all the extra work!)
Incidentally, another piece of random information about these walls, my contractor informed me that these are all individual boards hand crafted to fit! I just assumed they were large panels or something. The fact the my entire house house has these walls, parquet floors and planked ceilings downstairs, and custom cabinets blows my mind. Whoever built this house had more patience than I would have in fifteen lifetimes! Cutting and fitting all that wood...makes me shutter to think about it! I'll stick to painting it, and maybe I'll finish sometime in this century.
Psalms 90:12 So teach us to number our days, that we may apply our hearts unto wisdom.

Wow that looks fabulous! I am a new follower of your blog and love watching the transformation of your home. We too had a house full of dark woods and learned early on about liquid sandpaper from a painter...saved our lives. Our house didn't have the beautiful handcrafted wood like yours..I think it was just big panels. We have painted them three times since living here over 20 years as I've gone from pure white to more of a taupe color. Can't wait to see all your transformations!
ReplyDeleteMiss Bloomers
Sonia,
DeleteThanks so much for taking the time to comment! Isn't liquid sand just fabulous?! Whoever came up with that is definitely my hero! :) I'm glad we'll be seeing more of you. Thanks again for stopping by!
Abby
This comment has been removed by a blog administrator.
ReplyDeleteThe white paint did a wonderful job of brightening the entry way. You are making that house go from drab to amazing!! Thanks for giving me hope because we are looking at moving to the Myrtle Beach area in about 2 yrs & a lot of the houses that we have seen online that we liked had that wood paneling throughout the house. I'm not a big fan of the stuff because it reminds me of my grandparents basement. But now that I've been followinv what you are doing with your house I'm going to decinitely reconsider those houses. Keep up the inspirational work & I can't wait to see the next set of pics!
ReplyDeleteMaureen,
ReplyDeleteThank you for your kind comment! I'm not too far from Myrtle Beach, and it must just be a thing with houses up here. A lot we looked at had that wood as well. Good thing paint can fix just about anything! =) Good luck house hunting!
Abby
I have painted walls like this before and they are a huge pain in the neck. Great tips, thank you!
ReplyDeletexo,
Lisa
Such a huge difference! Good luck with the stairs it's going to look amazing
ReplyDeleteWow, what a task! Totally worth it. Your entry is stunning. Visiting from Someday Crafts linky party.
ReplyDeleteLooks great...good job! Hopefully the stairs will not be white. :)
ReplyDeleteThank you! Love this post and I am excited to do my own walls now :)
ReplyDeleteI love the transformation that you did. It made your home look warm and inviting. In short, it brought out a homey vibe. Although I think there’s nothing wrong about the stairs, I’m still curious what you're planning to do with them. If you’re going to ask me, it looks almost perfect, though painting it would indeed be preferable.
ReplyDeleteDean Ford
I'm impressed, I have to say. Actually hardly ever do I encounter a weblog that's equally educative and entertaining, and let me inform you, you may have strike the nail on the head. Your concept is outstanding the issue is one thing that not sufficient individuals are speaking intelligently about. I am very joyful that I stumbled throughout this in my find for anything referring to this.
ReplyDeleteWall colors Nepal
Wall paint colours Nepal
Wall painting colours Nepal
i thought is was a criminal act to paint over natural wood. I think my heart has been punctured! but then again, im a woodworker..
ReplyDeleteProfessionally written blogs are rare to find, however I appreciate all the points mentioned here. I also want to include some other writing skills which everyone must aware of. วอลเปเปอร์ลายไทย
ReplyDeleteInsanely comprehensive :)
ReplyDeleteThank you so much,
Now I have something to read during the holidays. This will take a while but well worth it like always
You can read another one here besttoolsbrand
Great tips! Painting wood walls definitely requires a different approach than drywall, and your guide makes it much easier to understand. In my own home projects, I’ve learned that having skilled pros—like dependable Plumbers in Alpharetta—can really streamline the whole process. Appreciate the helpful info!
ReplyDeleteA practical, experience-based guide that highlights how painting finished wood walls is far more complex than painting standard drywall, especially due to varnish, oil, and wood grain issues that require proper cleaning, deglossing, priming, and multiple coats for a durable finish. The step-by-step “clean, liquid sand, prime, and paint” approach is especially helpful for DIY renovators dealing with older homes that have solid wood interiors, custom carpentry, and layered finishes that resist paint adhesion. For larger renovation or maintenance projects involving wall finishes alongside plumbing or fixture changes, it can also be helpful to involve experienced professionals like Plumbers in Alpharetta to ensure all integrated systems are handled safely and efficiently during upgrades.
ReplyDelete