I figured that elastic around the bottom might be a problem, but I liked the unique neckline. In Walmart, about 30 minutes later...when I discovered I had forgotten to buy the dish soap, (errrrr...does anyone else besides me ALWAYS forget the one thing you went to the store for in the first place??!)...I randomly found myself in the fabric section. Imagine that. They had a just a bit of some faded pink matte jersey left on one of the bolts. Just enough, for me to make my own version of my Target shirt.
So, here is the gist of sewing up one of your own. Cut out a basic tank top first. (or you could make this really easy and just use a premade one)
Decide how long you want your long ruffle and how far across your shoulders you want it. Cut out a square on the fold with these measurements. Lay your tank on it. still folded in half, to get the exact copy of your neckline.
Cut out the neck. Then cut an arc from the far corner to the bottom. It will look like this.
Now sew up your tank, just like normal. Sew the "cape" pieces together at the shoulders.
Now put the "cape" inside the shirt, with both right sides facing out. Match up your shoulder seams.
Pin around the neck to hold it all in place.
Sew around the neck. Flip the "cape" out and over the shirt. It will look like this.
Doing it this way, gives you nice finished edge around the top, without you doing any extra work.
For the center ruffle, I cut a piece about three and a half inches wide, and longer than the shirt.
Sew a gathering stitch down each side of the strip.
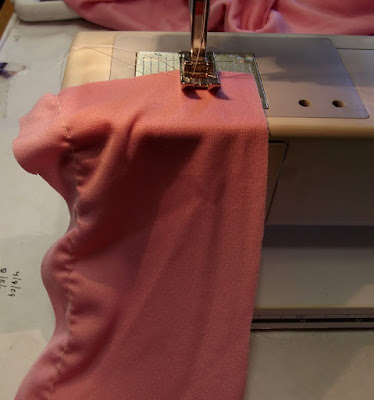
Gather the strip to the length of your shirt. Starting at the top, start pining it in place. I went nuts with pins, because my fabric was super stretchy and super slippery.
Sew the strip in place. If you use both your hands to pull the ruffles taunt horizontally while you are sewing, it helps to keep them from bunching up under your needle. For the back, I just tacked down the very tip of the "cape" to keep it in place.
That's all there is to it! Easy huh!
This little critter was supervising my picture taking. =)
Just for the record, that elastic on the original shirt is most unflattering...I unpicked it with my seam ripper, and it's so much better.
Luke 12:7 But even the very hairs of your head are all numbered. Fear not therefore: ye are of more value than many sparrows.
linking to:
Someday Crafts
Sew Woodsy
Sew Much Ado
My girlish whims
The Freckled Laundry


you won THE VERSATILE BLOGGER AWARD on my blog! <3
ReplyDeletecome to see the rules! :):)
with love, Oshi
http://oshifugushima.blogspot.com/2012/02/versatile-blogger-award.html
how easy, what a cute idea I would love you to add this and any other posts you want to show off to my What We Wore and Made party over at http://raegunwear.blogspot.com/search/label/WWWMW
ReplyDeleteHow completely cool! I LOVE this - you are a total clever clogs thinking this up...and the end result looks brilliant!
ReplyDeleteSarahx
Very cute! You are very creative.
ReplyDeleteVery pretty! Love the pink too of course :)
ReplyDeleteVery cute~ love the little ruching down the front. Awesome that you were able to eyeball that repro! Thanks for sharing with air your laundry Friday, Abby!
ReplyDeleteAwesome idea. Just what a need - another project. Ok ladies, I need help on another project. Making a cell phone cover for my daughter that has sheer on one side. How can I finish the stretch sheer without loosing too much stretch? Would a surger work? I don't owe one but could use this as a reason to get one. What about melting the edge? the fabric is so sheer and light even a simple hem looks heavy.
ReplyDeleteYou know, I bet this could be modified for a nursing top
ReplyDelete