▼
Tuesday, May 24, 2011
Messenger Bag Tutorial - Part 2
I failed to mention yesterday that this bag can be made without all those crazy pockets, you can have as many or as few of them as you like. Hopefully, I can explain to you today how to put it all together without thoroughly confusing you!
The first thing I did was fuse the two layers of the front panel together and the back panel together. This made the bag stand up nice and sturdy.
The next thing is to start sewing the front panel. Start with the two small pockets that have elastic on the top. Take the two layers and sew them together right sides together. Leave an opening to flip them right sides out when you are done. Sew the opening close and top stitch around the whole thing. Lay it out and find the center. Put a pin to mark it. Measure two inches to each side of the pin and put two more pins.
Bring the two outside pins to the center. This makes a box pleat. Measure two inches from the ends and do the same thing. It should look like this.
Center it on one layer of the larger pocket and sew along the bottom.
Now sew a piece of 10 inch long elastic to to the top. I used the wrong size elastic in this picture so just overlook that part. Half inch elastic works much better than this thin stuff.
Flip your pocket up and pin the sides and the down the center.
Sew the pocket on.
Sew the two layers of the larger pocket together, turn and top stitch along the top. Sew the larger pocket to the front inside panel. Just lay it on the way it should look and sew along the edges. We'll take care of those raw edges later. So now you have this for the inside front panel.
Sew another large pocket to the outside. Again, once you have the pocket made just lay it on and sew. Don't worry about the raw edges. This is the front of the front panel.
To do the back panel start with the outside smaller pockets. Sew them the same way as above. After they are attached, sew on the inside pockets the same way you did the other inside pockets.
Now sew the 8 inch strips of elastic to the inside layer of both side panels. Sew them 5 inches from the bottom. Sew them into whatever size loops you want. Also if you are making the snap loop for keys attach that now to one of the inside panels. Go ahead and sew the side pockets to the outside.
Sew or fuse the two layers of each side panel together. Sew the bottom two layers together. Now sew one side to the bottom, and then to the other side. It will look like one long strip.
Grab something round and round off the corners of your flap piece. Sew it together right sides together, turn and top stitch. Sew it to the back panel making sure you have it facing forward. If you are going to embellish it do it now, it is much harder to do it later like I did. Also I did not put any sort of clasp or snap on mine so if you want that you'll need to do it now too.
Sew the front to the bottom and the back to the bottom. The bag will look like a large cross. Sew up the sides on the wrong side on all four sides.
Now we want to get rid of all those raw edges so sew bias tape along each edge. This is a little tricky so just go slow and make sure it catches all the layers.
Flip it right side out and make your straps for the D-rings.
Loop the strap through the ring and sew it to the center of each side. Sew it in a box with an "X" through it.
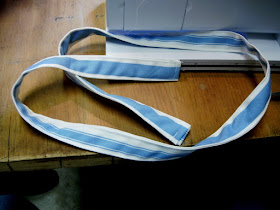
To make your strap, fold the raw edges to the center and then fold in half. Top stitch down both edges.
Sew it to the D-rings the same way you did the loops.
All done! It is a lot of work to make a bag, but to me the benefits of being able to customize it to hold exactly what you want it to makes it completely worth it. Enjoy!


Do you think I could make this withOUT a sewing machine? Mine is currently broken, I think the timing is off but I don't know how to fix it!
ReplyDelete