Monday, February 4, 2013

The Kitchen - The good, the bad, and the ugly (mostly ugly)

       Well good morning! How was your weekend? We are finally all moved in, set up with internet, and even have a way to cook and wash our clothes...great progress indeed! Now that we are situated back in one spot again, and happily reunited with our belongings, I have decided to re-open my Etsy shop. Hurray! Honestly, I really just miss sewing! I mean painting my fingers off and hacking things up with crowbars is great fun, but it just doesn't beat sewing! I've only listed about a third of the items, because I want to make sure I can keep up with everything. (And that I can actually find the supplies to make said items in my small jungle of boxes!)
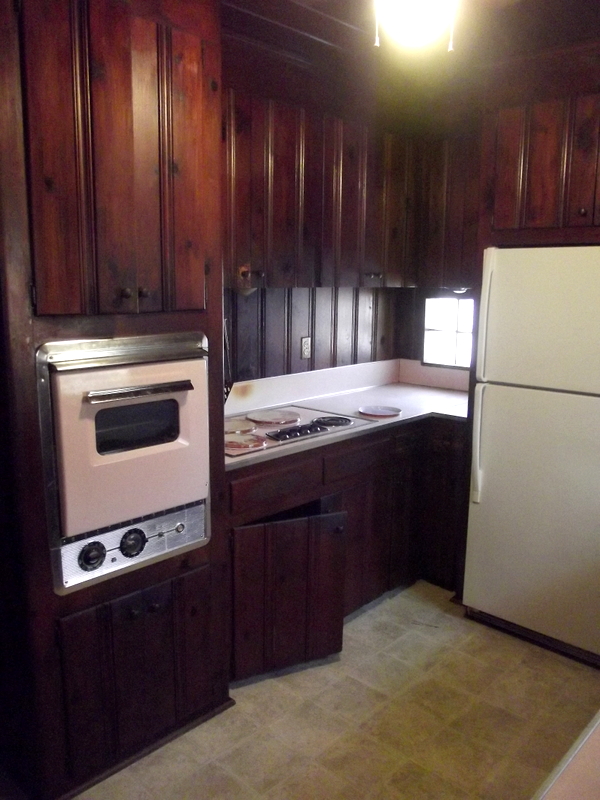
       Anyway, I actually got on here to talk to you about kitchens. See, I've got this kitchen in my new (old) house that is just not so lovely. In fact, its rather awful, not to mention hideous. It began like this...dark as a cave, refrigerator plopped in a weird encasement smack in the middle of the counter, and the dirtiest pink counter tops you've ever seen in your life! (I actually haven't seen pink counter tops before this...I hope I don't have the pleasure again!)

 
     And on the left side over here, we have a counter top range and antique pink oven...both that have been out of use for who knows how many decades! (So, what exactly did the previous owner eat I wonder?? Cold cereal every day?) Oh yes, and don't forget that odd little window in wall...eh? Odd.


        And lastly we have the laundry closet....At least I think it was, that is where the plumbing went for a washer. The closet isn't deep enough to fit a washer into it, so that is a bit of a mystery to me. It's pink too...and dirty. Very dirty.


     So. Now that I've seared your eyeballs, let's continue. Here is what we have done so far. I had this cabinet hollowed out.


     This made space for a dishwasher to be installed.


      I had the weird wood encasement around the refrigerator removed, which created a nice spot for the oven and microwave. I also removed the doors from the cabinets on either side to create open shelving. It's rather hard to see since the walls are so dark.


      My mister, to my everlasting joy, removed the pink counter tops and old appliances.


      Gaping holes and glue-y plywood is ever so much better, don't you agree?


      And last, I removed the doors to the laundry closet, cleaned it (and cleaned it some more!), and had an outlet installed to accommodate the refrigerator. It's still pink for the time being, but at least it's clean! (By the way, that's plastic still covering my fridge, not a giant wart exploding on the door.)


     This closet will be the pantry. I plan to paint it some nice accent color (maybe stencil a design on the walls?), and install shelving above and on the right side of the fridge. Right now the hot water heater is on the right, but we hope to have a tank-less one put in, so that will get rid of that. I'm thinking something along these lines.

Pinned Image
Pinterest (original source?)

    For the gaping hole left by the old oven, I plan to install drawers similar to these. I'm thinking if I had a plug put in the back, I could keep heavier appliances in the drawers, and just pull them out to use them.

Pinned Image
Pinterest (original source?)

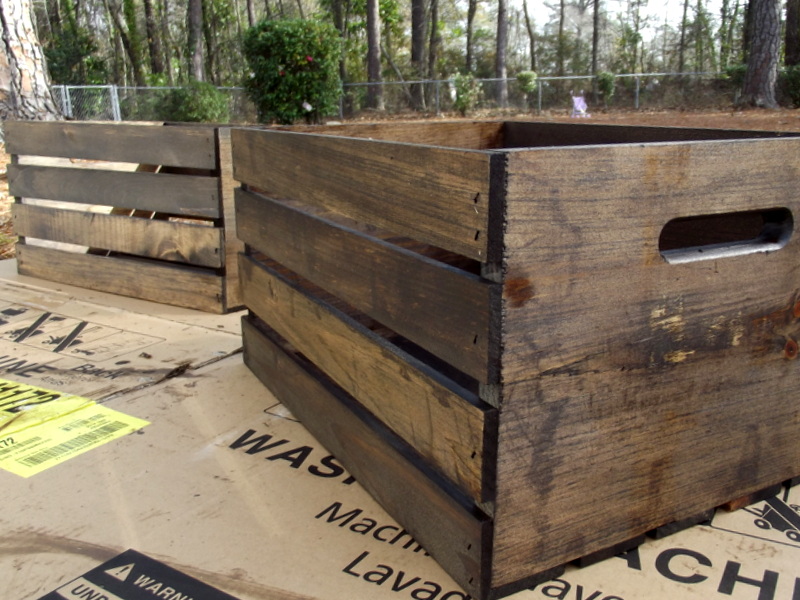
      The cabinets are originally custom built, solid wood, so I won't be messing with them. I like them, and they are much better quality than the builder's grade cabinets most houses have now. I'll paint them, and switch out the hardware to black or stainless steal. For the counter tops, I plan (ok really, I plan for my mister) to do a DIY butcher block using wood boards, but stain them super dark. 

dark counter top
Pinterest (original source?)

     For the open shelving that was created around the stove, I plan to put brackets under the shelves. The whole shebang will be painted white, and the ceiling left wood. 

Pinned Image

      I'm not sure what the plan will be for the floor just yet, probably paint it. I'd like to switch out the ceiling fan/light for something rustic/antique looking. Over all, I'm going for fresh white, with woods and dark accents mixed in...something along these lines. 

Pinned Image
      Of course, it is rather difficult to see that in what I'm looking at now...but it will get there! Check back around in a few weeks, and we'll see what we've got then!
Have a great start to your week!
P.S. I'm really sorry I can't find the original sources to some of the above pictures...if anyone knows them, let me know so I can give credit!

Psalms 16:11   Thou wilt shew me the path of life: in thy presence is fullness of joy; at thy right hand there are pleasures for evermore. 
Pin It

Wednesday, January 30, 2013

A Very Improper Bathroom Redo


      Did you do a gift registry when you got married? I did one. I clearly remember carefully selecting perfectly matching towel bars, hand towel rings, and toilet paper holders.


    I picked soap holders, and very proper little trashcans.


      The thought that one is not required to dress a house in perfectly matching items from an acceptable house wears store never even occurred to me!!


     I remember a great many silly opinions I had a new house keeper.


       I distinctly remember throwing a fit about all the white walls in my first house.


      I bet you can't guess what color every single blessed wall in this house is going to get painted?!


       I would have turned up my nose at much of the thrift store "this and that" that now I love to scatter about the house.


      To put a kitchen run in the bathroom would have been totally unacceptable.


        One must do what what is acceptable to do!


       The problem with acceptable ... it's just so bland.


     I would hate to know what I would have thought of this house, if I had seen it back then.


       It's funny time can change you isn't it?


      The lesson I'm learning in this house? Look at what it can be, not at what it is! That is how God looks at me, and I am ever so grateful.
   
Philippians 1:6   Being confident of this very thing, that he which hath begun a good work in you will perform it until the day of Jesus Christ: 

Tuesday, January 22, 2013

Rug Drama - Painted Rug Tutorial


       Rugs are wonderful little things that really can add a nice statement to a room. Unfortunately  they usually have a hefty price tag attached that is quite less than wonderful. I've been scouting around for a rug for my front door, and found many...that is, many that were either too big, too small, too bland, too expensive, too the wrong color, too you get the point. I have the shopping patience of a small ant, so rather than opt to wait for the next 6 months to see if I found one I liked, I decided just to paint one. A painted rug is hardly a new concept, just google it and you'll see what I mean! I've used a a sharpie on a rug before, but this was a first for me to try to paint one.
     I picked a 3 x 5 cream colored rug for $13 from Walmart. It has a low pile and is quite heavy, which for a front door is a good thing! Nothing worse than a rug sliding all around and curling at the edges!


     I wanted something that would look like it was an actual rug design, not really something that looked crafty. I like decor that has a bit of drama, so I opted to put to go with a diamond pattern down the center. Rather than be all technical and actually measure anything, I grabbed a tin decoration I had lying around, and just traced three diamonds onto the rug with a grey marker.


      Because I don't trust my coloring in the lines skills, I taped off the edges before I filled them in with paint.


       I used a silver metallic paint from Martha Stewart's paint line. Unfortunately  the metallic shine didn't really come through once it was on the rug, but I still liked the color OK.


      Starting at the corners, I used a stencil I bought from Hobby Lobby to fill in the edges.


     Once it was finished, I felt it looked a little too flat. It needed something to give it just a bit of dimension.


      I decided to use a sponge and some cream colored paint to add a bit of depth to the diamonds.


      Using a very, very small amount of paint on the sponge, I patted it on randomly.


      It doesn't make a huge difference, but it's enough of one to keep it from just looking like blah grey diamonds.


      It's actually going to be turned length wise in front of the door, but I turned it this way so the light would hit it to take pictures. I haven't painted any walls yet, so my entry is still rather dark and tomb like...not the best for trying to take a clear picture of anything!


     I think this rug, paired with the chandelier and entry way furniture I have planned, will create just the right feel for a front door first impression. I have a thing for entries, I think they set the tone for the rest of the house.


       Now that I've bit the bullet and painted a rug for myself, the price would have to be pretty stinking amazing to get me to go rug shopping again!...that is, unless it's in the "plain Jane, less than $20" rug section! What do you think, are painted rugs too craftyish, or do you think they can look as good as the real deal?
    I hope the rest of your day is wonderful, thanks so much for stopping by!

Psalms 18:28   For thou wilt light my candle: the LORD my God will enlighten my darkness. 

Sunday, January 13, 2013

Crate Wall Storage

     Well hello there! How was your weekend? Mine was productive. So productive in fact, that I actually finished something to show you! I know, stunning.


     The only room in this old house of ours that has ever been painted or updated is the downstairs guest bathroom. A very small bathroom I might add.  Somehow a shower, pedestal sink and toilet were all miraculously made to fit in this tiny little room. Needless to say, there is absolutely no space for any sort of storage for all the items that typically a guest might need to find in a bathroom. If there was one thing I learned in my last tiny little home, it would be the art of cramming a lot of stuff into a small space! Although this house is more than twice the size of that one, I'm finding my "small house" mentality is proving helpful with organizing this one. My method is simple, first look up. What can you do with the vertical space? Second, if the storage has got to be out in the open, make it function as decor as well as storage. So here we go, simple wall storage for my little guest bathroom.


      I picked up two of these crates at Home Depot for $8 each. (Confession: I actually already had about 6 vintage crates I've picked up at flea markets and such that I could have used...but I have a crate collecting obsession, and I couldn't bear the thought of putting the old cute ones in the bathroom. Lame. I know.)


       I stained them with a dark wood stain. I wasn't the least bit worried about it looking perfect, the uneven stain adds to the affect, I think.


      Next, I screwed on some brackets. I found mine at Lowes, I believe.


       I screwed them onto the wall where I wanted them, and that was it!


      I think they are elegantly rustic. Is that a style? Whatever, I like them, and they do the trick just nicely. You know, if you only had one and hung it high enough, you could stick a bar through the brackets for it to double as a towel rack too!


     I'm almost finished with this bathroom, one or two more tweaks to go. The rest of the rooms will go far more slowly I'm afraid, as there is much, much more work to be done in them! Really, just having one room looking pleasant and fresh gives me a boost of energy every time I pass the door. I know the rest of the house will get there with a little time...and the process of getting there is actually pretty fun!


      Enjoy your week!

Psalms 3:3   But thou, O LORD, art a shield for me; my glory, and the lifter up of mine head.